How Do You Install SQL Server Data Tools
SQL Server Data Tools (SSDT) is an essential tool for developers working with SQL Server. It provides a range of capabilities for database development, including designing, building, testing, and deploying databases.
In this article, we’ll guide you through the installation process, covering key steps and considerations. By the end, you’ll be equipped to set up your development environment and start creating powerful database solutions.
How to Install SSDT
SSDT can be installed as a part of Visual Studio, which is ideal for developers who already use Visual Studio or plan to use its integrated development environment (IDE) for SQL Server development.
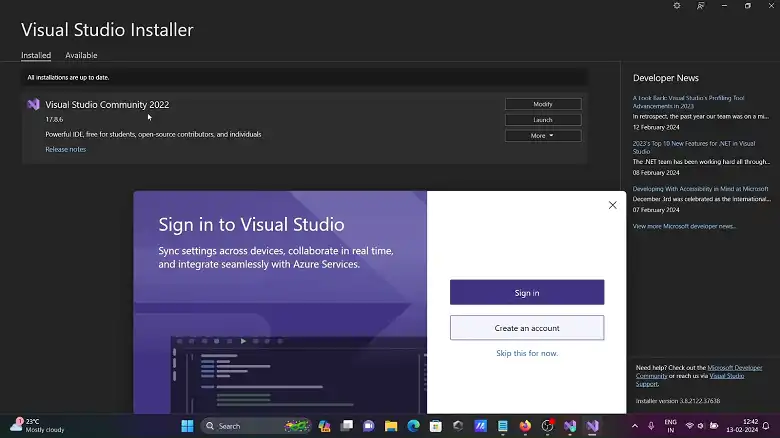
1. If you don’t have Visual Studio installed, download the installer from the Visual Studio website. If you already have Visual Studio, you can launch the installer directly.

2. Once the installer is launched, either from a fresh download or an existing installation, select the edition of Visual Studio you want to modify or install.
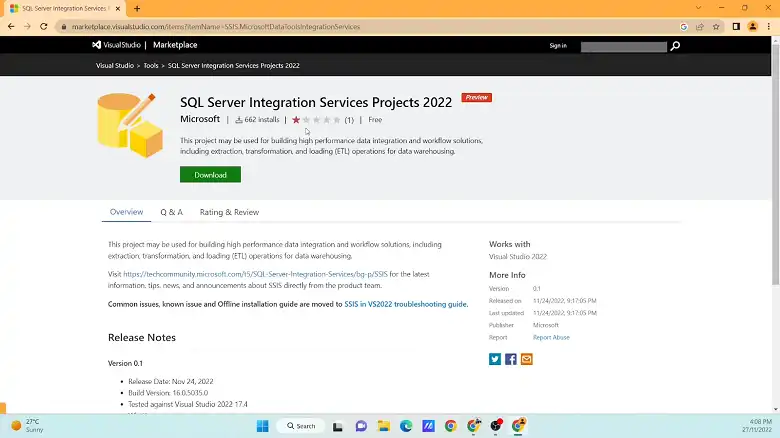
Download the “SQL Server Integration Services Projects” exetnsion. This includes SSDT components necessary for SQL Server development.
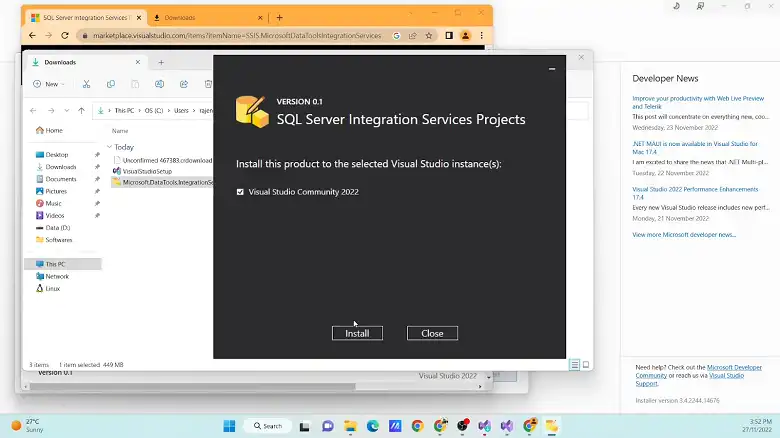
Click the “Install” or “Modify” button to start the installation process. This will install SSDT along with Visual Studio.
How to Check if SQL Server Data Tools Are Installed
If you have SSDT installed as part of Visual Studio, you can verify the installation through the Visual Studio environment.
1. Open Visual Studio: Launch Visual Studio from the Start menu or desktop shortcut.
2. Check Installed Workloads:
Go to the “Help” menu and select “About Microsoft Visual Studio.”
In the dialog that opens, you’ll see a list of installed workloads and components. Look for “SQL Server Data Tools” in this list.
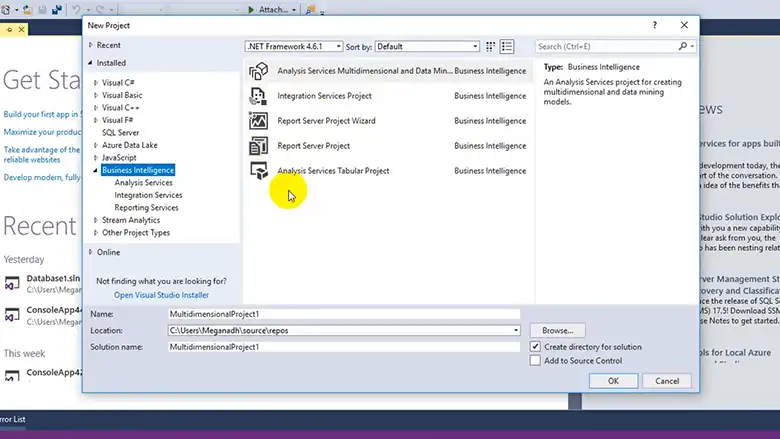
3. Create a New Project:
Go to “File” > “New” > “Project.”
In the “Create a new project” dialog, search for SQL Server-related templates such as “SQL Server Database Project” or “Integration Services Project.”
If these templates are available, SSDT is installed.
Frequently Asked Questions
What are the system requirements for installing SSDT?
The system requirements for SSDT are aligned with those of Visual Studio. It requires Windows 10 or later, a minimum of 2 GB RAM, and at least 1 GB of available disk space.
How to connect SSDT to SQL Server?
To connect to a database using the SQL Server Object Explorer in SQL Server Data Tools (SSDT), launch Visual Studio after ensuring you have installed both SSDT and the compatible version of Visual Studio. Then, navigate to the View menu and select SQL Server Object Explorer.
Conclusion
Installing SQL Server Data Tools is straightforward, with multiple methods available to suit different needs. Whether integrated with Visual Studio, installed as a standalone application, or deployed via the command line, SSDT provides a powerful platform for SQL Server development.