How to Import Access Database to SQL Server (10 Steps to Import)
A size limit of only 2GB and maximum support for 255 concurrent users are enough reasons for anyone to import their Access database to an SQL server. Once you upgrade to an SQL server, you will get support for larger amounts of data, more concurrent users, and an overall better capacity.
And the good news is you won’t need any additional software for importing. The SQL Server Management Studio or Microsoft SQL Server Migration Assistant (SSMA) is more than enough.
How Do I Import Access Database to SQL Server?
You can use two tools for importing Access databases to an SQL server: 1. SQL Server Management Studio and 2. Microsoft SQL Server Migration Assistant (SSMA).
Import Access Database Using SQL Server Management Studio
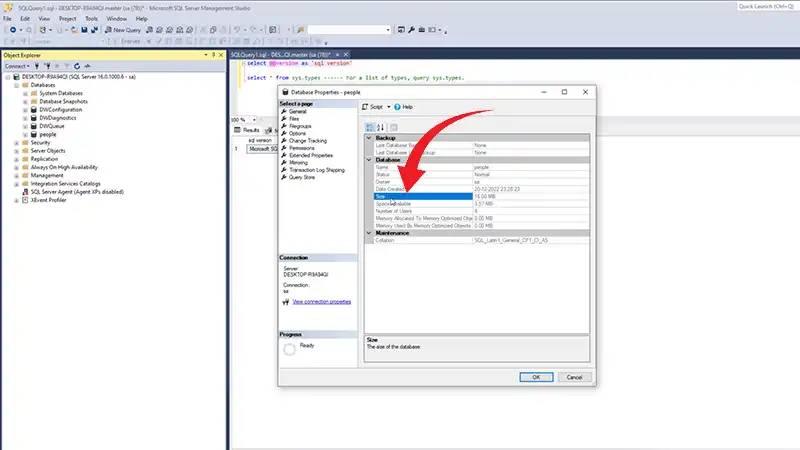
1. Start SQL Server Management Studio. Make sure you choose Run as administrator.

Connect to the SQL Express database that you have already set up.

2. Go to databases, right-click on database, and create a new database. Name it whatever you want.

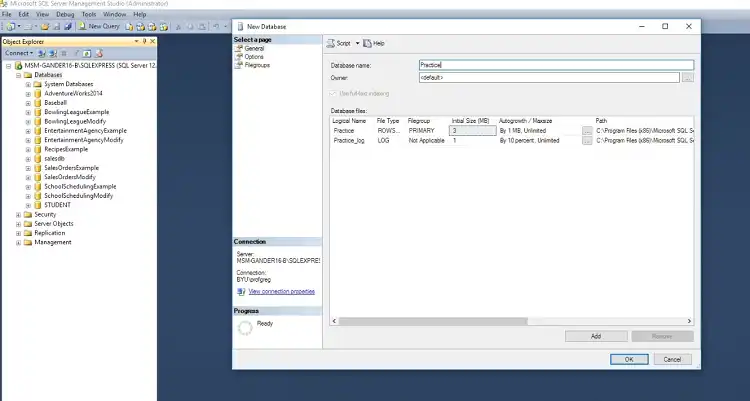
3. Now, click on the database that you just created and choose Task. A list of options will appear, where you can store backups and restore them if necessary.

4. Go down and find the option called Import Data. Click on Import Data to bring up Microsoft Wizard.

Once the Microsoft Wizard appears, click Next. A popup will say Choose a Data Source.
Expand the dropdown menu to see all available valid data sources on your system. Look through the list and choose the Microsoft Access database as your data source.

Click Next to continue.
5. Click Browse and go to the folder where you saved the database you want to import. Locate the file, select it, and click Open.
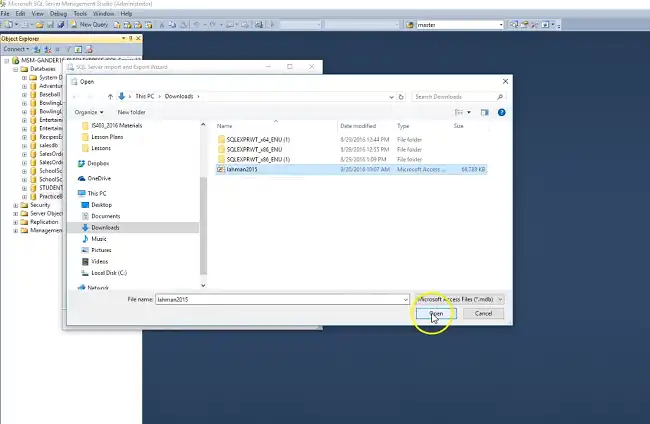
6. After that, choose Advanced and click on Test Connection. If everything is okay, you should get a popup saying that the Test connection succeeded. Click OK to close the popup.
7. Select OK again and close the window named Data Link Properties.
Click Next, and you will get redirected to the Choose a Destination page. Expand the dropdown menu on the right side of Destination. Next, scroll down to find SQL Server Native Client with its current version. Select it.
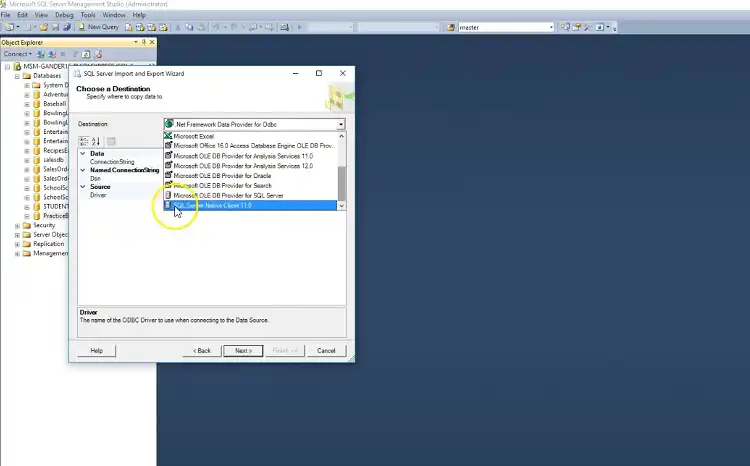
You can change the database name where you want to restore it. There’s also an option to create a new database. However, since you already created a database, you can skip that. So, hit Next to proceed.
8. Keep the default selection which says Copy data from one or more tables or views. Or you can choose the Write a query option to specify the data to transfer. Click Next again.

To select all the tables and views together, check the box in the top-right corner. Then choose Next.

9. The checkbox next to Run immediately should already be checked., You would want to leave it like that and click on Next.
10. You’ll now see a list of statements about to be executed. Click Finish so that the importing from Access can begin.
On the Performing Operation page, you can see the import status while the new tables get created on the SQL server. Once the process is complete, a Success message and a green checkmark icon will appear next to each action. Hit Close and click on the new database to view all the imported tables.
Import Access Database Using SSMA
After installing SSMA, follow the instructions to provide information regarding the server location and Access database you want to import.
If you want to import a linked table to SQL Server 2016 or above, go to Review Tools, then Project Settings, and inside the General tab, add a row version field. It will help avoid conflicts among the records.
Choose Review Tools and head over to Project Settings. Then choose Type Mapping to set precise data types.
SSMA generally converts Access objects to SQL Server objects by default. However, it takes time to copy them. In this case, you can use the SSMA assessment report to see conversion results and errors (if any).
Conclusion
If you’re using SSMA, you can link to the Access tables in the new host SQL Server after you migrate them. Linking from Access directly instead of using complex SQL Server management tools will provide an easier way of inspecting your data.
