How to Get Teams Webhook URL | Easy Method
Microsoft Teams is a popular collaboration tool that allows teams to communicate and work together efficiently. One powerful feature of Microsoft Teams is the ability to integrate with other applications using webhooks. Webhooks allow you to send data from an external application to a Teams channel. This article will guide you through the process of obtaining a Teams webhook URL, which is essential for setting up these integrations.
Prerequisites
Before you start, ensure you have the following:
A Microsoft Teams account.
Permission to add connectors to a Teams channel.
Steps to Get Teams Webhook URL
Open Microsoft Teams
Start by opening Microsoft Teams either through the desktop application or via the web interface.
Navigate to the Desired Channel
Select the team and channel where you want to add the webhook. Webhooks are added on a per-channel basis.
Access the Channel Settings
Click on the “More options” icon (three dots) next to the channel name.
Select “Connectors” from the drop-down menu.
Add an Incoming Webhook
In the Connectors window, search for “Incoming Webhook”.
Click the “Add” button next to Incoming Webhook.
Confirm by clicking the “Add” button again in the pop-up window.
Configure the Webhook
In the configuration window, give your webhook a name. This name will appear as the sender of messages posted by the webhook.
(Optional) Upload an image to represent your webhook.
Click the “Create” button.
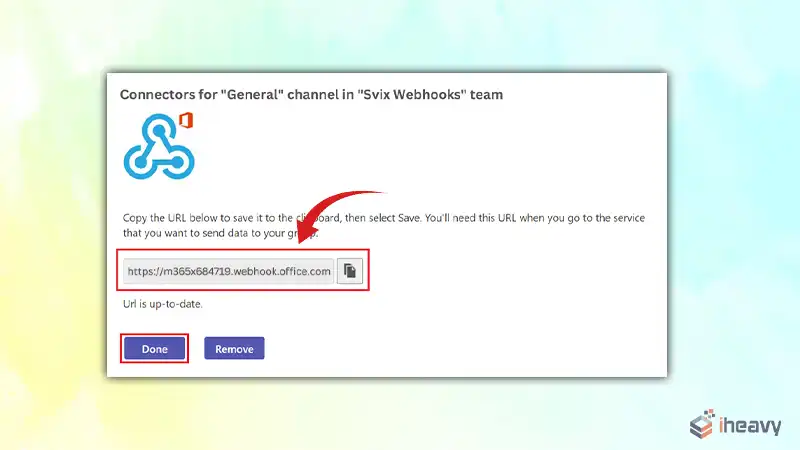
Copy the Webhook URL
Once the webhook is created, a unique URL is generated. Copy this URL as it will be used to send messages to the Teams channel.
Use the Webhook URL
You can now use the webhook URL to post messages to the Teams channel from your application or service. Below is an example of how to use this URL in a Python script.
Example Code
Here is an example of how to send a message to a Teams channel using the webhook URL with Python:
import requests
import json
webhook_url = 'YOUR_WEBHOOK_URL_HERE'
message = {
    "text": "Hello, this is a message from the webhook!"
}
response = requests.post(webhook_url, headers={'Content-Type': 'application/json'}, data=json.dumps(message))
if response.status_code == 200:
    print('Message sent successfully!')
else:
    print(f'Failed to send message. Status code: {response.status_code}')
Frequently Asked Questions
Can I use the same webhook URL for multiple channels?
No, each webhook URL is unique to a specific channel. You need to create separate webhooks for each channel.
How can I delete a webhook?
To delete a webhook, go to the channel settings, select “Connectors”, and then click on “Configured”. Find the webhook you want to remove and click “Remove”.
Are there any security considerations when using webhooks?
Yes, ensure that the webhook URL is kept secret and not exposed publicly. Treat it like a password because anyone with the URL can send messages to your Teams channel.
Conclusion
Setting up a webhook in Microsoft Teams is a straightforward process that allows you to integrate various applications and services into your Teams channels. By following the steps outlined in this guide, you can easily generate a webhook URL and start sending automated messages to enhance your team’s productivity and collaboration.