How to Add a Column in Rails | Explained
In Ruby on Rails, modifying the database schema is a common task that can be efficiently handled using migrations. Adding a column to an existing table is a frequent operation. This article will guide you through the process of adding a column in Rails, ensuring your application remains stable and consistent.
Steps to Add a Column in Rails
Generate a Migration
Rails provides a generator to create a migration file. You can generate a migration to add a column to a specific table using the following command:
Bash
rails generate migration AddColumnNameToTableName column_name:data_type
Replace ColumnName with the name of the column you want to add, TableName with the name of the table, and data_type with the type of data the column will hold (e.g., string, integer, boolean, etc.).
Example
bash
rails generate migration AddAgeToUsers age:integer
This command generates a migration file with the appropriate syntax to add an age column of type integer to the users table.
Review and Edit the Migration File
The generated migration file is located in the db/migrate directory. Open the file to review and make any necessary adjustments.
ruby
class AddAgeToUsers < ActiveRecord::Migration[6.0]
  def change
    add_column :users, :age, :integer
  end
End
This file contains the code to add an age column to the users table. You can add options like null: false, default, or index if needed.
Run the Migration
To apply the migration and update the database schema, run the following command:
Bash
rails db:migrate
This command executes the migration and adds the specified column to the table.
Verify the Changes
After running the migration, verify that the column has been added to the table. You can use the Rails console or check your database schema.
Using Rails Consol
bash
rails console
Ruby
User.columns
This command lists all columns of the users table, including the newly added age column.
Example Code
Here is a complete example of adding a birthdate column to the users table:
Generate the Migration
Bash
rails generate migration AddBirthdateToUsers birthdate:date
Review the Migration File
ruby
class AddBirthdateToUsers < ActiveRecord::Migration[6.0]
  def change
    add_column :users, :birthdate, :date
  end
End
Run the Migration
Bash
rails db:migrate
Verify the Changes
bash
rails console
Ruby
User.columns
Frequently Asked Questions
How can I add multiple columns in a single migration?
You can add multiple columns in a single migration by listing them in the add_column method calls within the change method.
Example
ruby
class AddDetailsToUsers < ActiveRecord::Migration[6.0]
  def change
    add_column :users, :address, :string
    add_column :users, :phone_number, :string
  end
End
How do I roll back a migration?
You can roll back the last migration using the following command:
Bash
rails db:rollback
To roll back multiple migrations, specify the number of steps:
Bash
rails db:rollback STEP=3
Can I add an index to the new column?
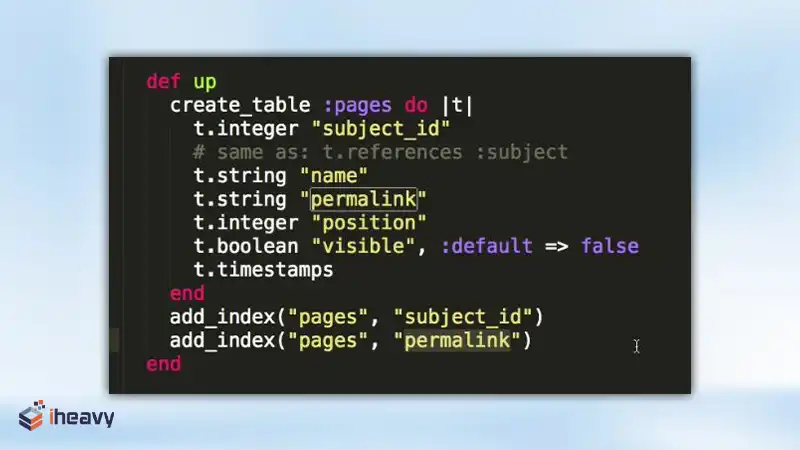
Yes, you can add an index to the new column using the add_index method in the migration file.
Example:
ruby
class AddAgeToUsers < ActiveRecord::Migration[6.0]
  def change
    add_column :users, :age, :integer
    add_index :users, :age
  end
End
Conclusion
Adding a column to an existing table in Rails is a straightforward process when using migrations. By following the steps outlined in this article, you can ensure your database schema evolves smoothly to meet the needs of your application. Remember to review and test your migrations carefully to maintain data integrity and application stability. With these practices, you can confidently manage your Rails application’s database schema.