Error 2002 (HY000) | How to Fix It Like a Pro
MySQL is a popular open-source relational database management system, widely used for web development and other applications. However, like any software, MySQL can encounter errors, and one of the common ones is “ERROR 2002 (HY000).”
This error typically indicates an issue with the MySQL server connection. In this article, we’ll explore what causes ERROR 2002 (HY000) and provide step-by-step instructions on how to troubleshoot and fix it.
What Is Error 2002 HY000 in MySQL?
ERROR 2002 (HY000) occurs when a client application, such as MySQL command-line client or a web application, cannot establish a connection to the MySQL server. The error message often looks like this:
ERROR 2002 (HY000): Can’t connect to local MySQL server through socket ‘/var/run/mysqld/mysqld.sock’ (2)
This message indicates that the client is unable to connect to the MySQL server using the specified socket file. It can happen for various reasons, ranging from configuration issues to problems with the MySQL server itself.
Possible Causes of ERROR 2002 (HY000)
Below are a few probable reasons that may cause the error 2002.
1. MySQL Server Not Running
The most common cause of this error is that the MySQL server is not running. Check if the MySQL server is started by running the following command in your terminal or command prompt.
For Linux:
sudo service mysql status
For macOS:
mysql.server status
For Windows:
sc query mysql
2. Incorrect MySQL Configuration
The MySQL client may be looking for the MySQL server in the wrong location. Ensure that the MySQL configuration file (usually located at /etc/mysql/my.cnf or /etc/my.cnf) has the correct information, including the correct socket file path.
3. Insufficient Permissions
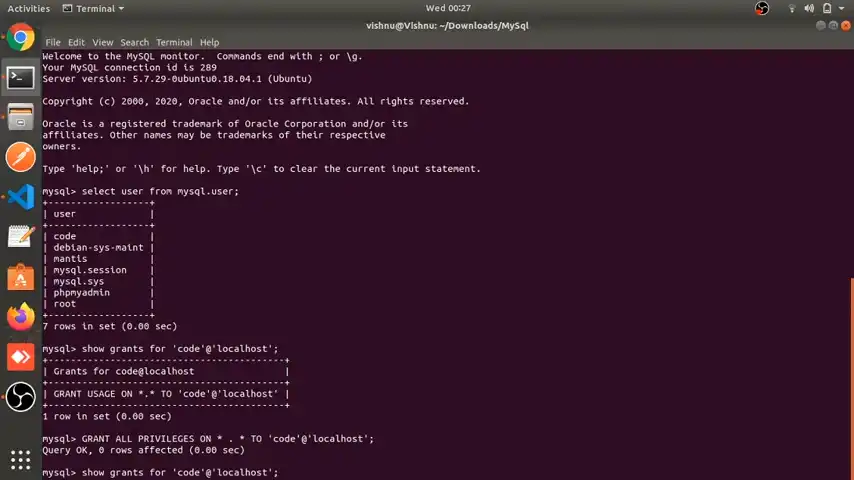
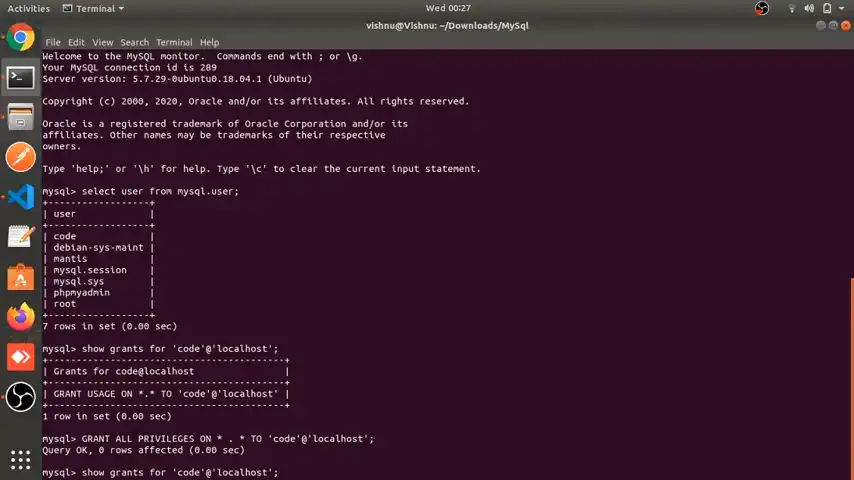
The user running the MySQL client may not have sufficient permissions to access the MySQL server. To check the existing permissions of a MySQL user, you can use the following SQL query:
SHOW GRANTS FOR ‘your_username’@’your_host’;
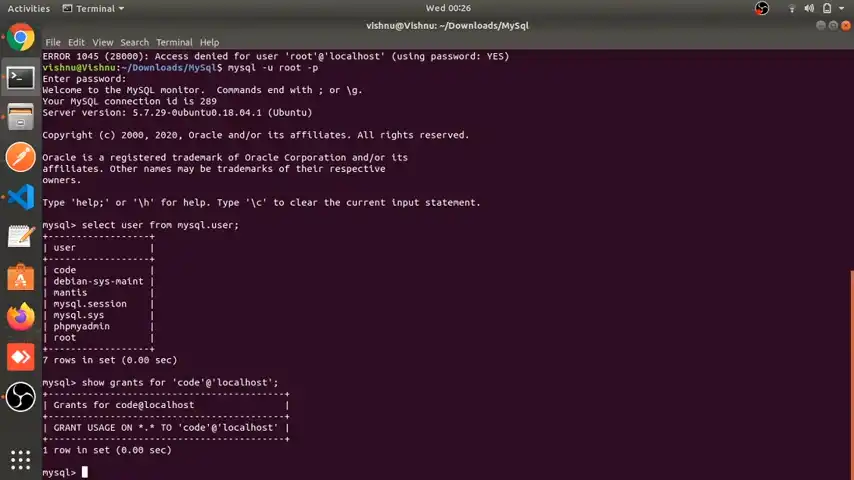
Replace ‘your_username’ with the actual username you want to check, and ‘your_host’ with the host from which the user is connecting (usually ‘localhost’ for a local connection).
4. Socket File Absence or Misconfiguration
The specified socket file in the MySQL configuration may be missing or misconfigured. Verify the correct path to the socket file and update the configuration accordingly.
The relevant configuration files include:
– /etc/my.cnf
– /etc/mysql/my.cnf
– /var/lib/mysql/my.cnf
How to Fix Error 2002 in MySQL?
Once you have identified the underlying cause of the error, you can opt for one of the following solutions.
Check MySQL Server Status
Ensure that the MySQL server is running. If not, start it using the appropriate command for your system (sudo service mysql start for Ubuntu/Debian, sudo systemctl start mysql for systems using systemd).
Verify MySQL Configuration
To ensure that the MySQL client is configured with the correct information, especially regarding the socket file path, follow these steps:
1. Locate the MySQL Configuration File:
The MySQL configuration file is typically named my.cnf and is located in one of the following directories:
/etc/mysql/my.cnf
/etc/my.cnf
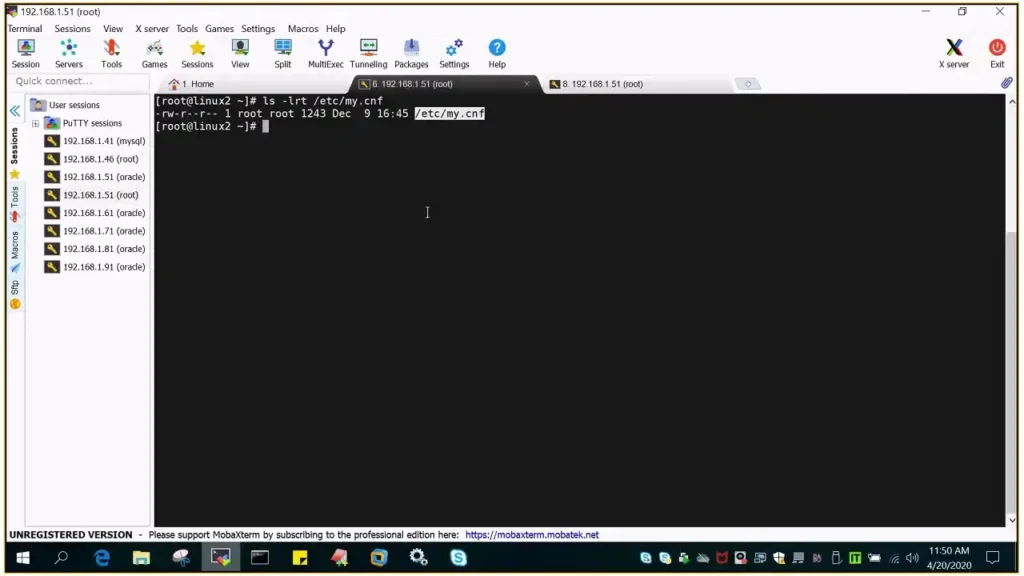
Use the following command to find the exact location:
sudo find / -name my.cnf
2. Open the MySQL Configuration File:
Once you’ve located the configuration file, use a text editor to open it. You can use commands like nano, vim, or gedit depending on your preference and availability. For example:
sudo nano /etc/mysql/my.cnf
3. Verify Socket File Configuration:
Look for the section in the configuration file that specifies the socket file path. It may look something like this:
[mysqld]
socket = /var/run/mysqld/mysqld.sock
Make sure that the socket parameter points to the correct location for the MySQL server socket file.
4. Update Socket File Path (if needed):
If the socket file path is incorrect, update it to the correct location. For example:
[mysqld]
socket = /tmp/mysql.sock
Save the changes and exit the text editor.
5. Restart MySQL Server:
After making changes to the configuration file, you need to restart the MySQL server to apply the new settings. Use the following command:
sudo service mysql restart
Update Socket File Configuration
If the socket file is misconfigured, update the MySQL configuration file with the correct socket file path. Within /etc/my.cnf, you might find the socket file configuration set to /tmp/mysql.sock. On the other hand, /etc/mysql/my.cnf could specify /var/run/mysqld/mysqld.sock as the socket file configuration.
To resolve the issue, consider removing or renaming /etc/mysql/my.cnf and allowing MySQL to utilize /etc/my.cnf. This adjustment may effectively solve the problem.
Grant Sufficient Permissions
Confirm that the user connecting to the MySQL server has the necessary permissions. Use the GRANT statement to grant the required privileges. For example, to grant all privileges on a specific database to a user, you would use the following query:
GRANT ALL PRIVILEGES ON your_database.* TO ‘your_username’@’your_host’;

If you prefer to grant specific privileges rather than all, you can do so by specifying them individually. For instance, to grant SELECT, INSERT, UPDATE, and DELETE privileges, you would use:
GRANT SELECT, INSERT, UPDATE, DELETE ON your_database.* TO ‘your_username’@’your_host’;
Frequently Asked Questions
What should I do if the MySQL server is running, but I still get error 2002?
The error 2002 (HY000) can still occur when your MySQL server is running. If that is the case, check the MySQL server logs to get more insights into the root cause of the problem.
How can I access MySQL logs?
Look for the MySQL error log, typically located in /var/log/mysql/error.log on Linux systems.
Is it safe to reinstall MySQL?
Reinstalling MySQL is generally safe, but make sure to back up your databases before doing so.
Conclusion
This common error can be a roadblock, but with the right guidance, you can navigate through it. By following the steps outlined in this guide, you should be well on your way to resolving the Error 2002 (HY000) in MySQL. If you have any questions or need further assistance, feel free to reach out. Thanks for reading!
