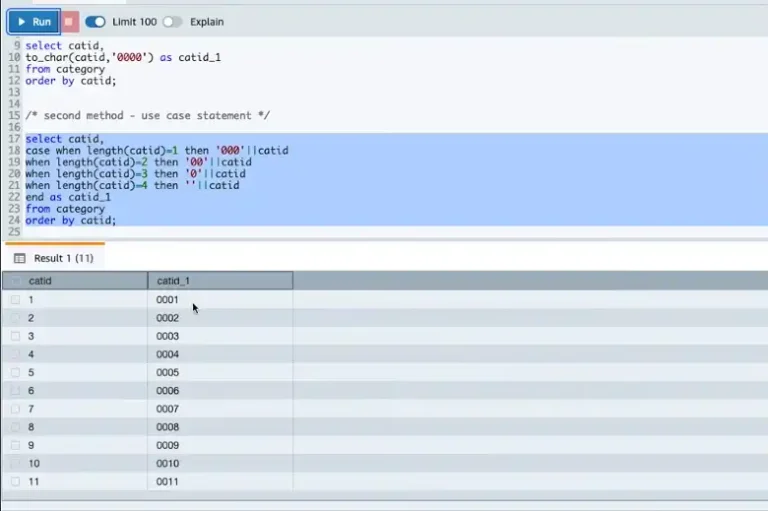
Install SQL Server on Ubuntu
Microsoft SQL Server, a widely-used relational database management system, is known for its reliability, performance, and security. Although traditionally associated with Windows, SQL Server can also run on Linux-based systems, including Ubuntu.
This article will walk you through the steps to install SQL Server on Ubuntu, enabling you to run SQL Server on Ubuntu with the same reliability and performance you’d expect on Windows.
How to Install MySQL Server in Ubuntu?
Before you begin, ensure that your Ubuntu system meets the following requirements:
- Ubuntu Version: SQL Server is supported on Ubuntu 18.04, 20.04, and 22.04.
- Memory: A minimum of 2 GB of RAM.
- Storage: At least 6 GB of available disk space.
- CPU: x64 processor.
You also need to have sudo privileges to install SQL Server on Ubuntu.
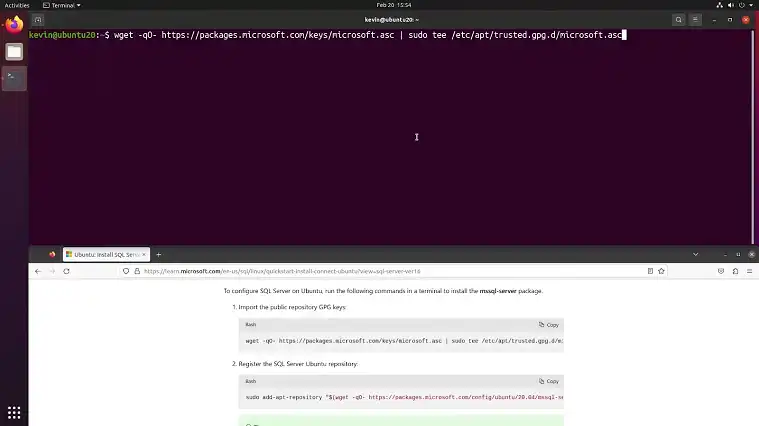
Step 1: Import the Microsoft GPG Key
The first step in the installation process is to import the Microsoft GPG key. This key is used to verify the integrity of the SQL Server packages.
wget -qO- https://packages.microsoft.com/keys/microsoft.asc | sudo apt-key add -This command downloads the Microsoft GPG key and adds it to your system’s list of trusted keys.
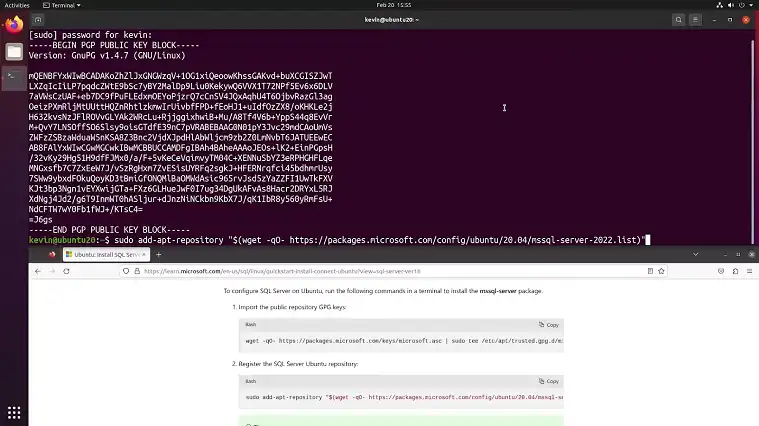
Step 2: Register the Microsoft SQL Server Ubuntu Repository
Next, you need to register the Microsoft SQL Server repository to the Ubuntu package source list. This enables your system to locate the SQL Server installation packages.
sudo add-apt-repository "$(wget -qO- https://packages.microsoft.com/config/ubuntu/$(lsb_release -rs)/mssql-server-2022.list)"The above command dynamically finds your Ubuntu version using lsb_release -rs and registers the appropriate repository.
Step 3: Install SQL Server
With the repository added, you can now install SQL Server. Begin by updating the package lists on your system:
sudo apt-get update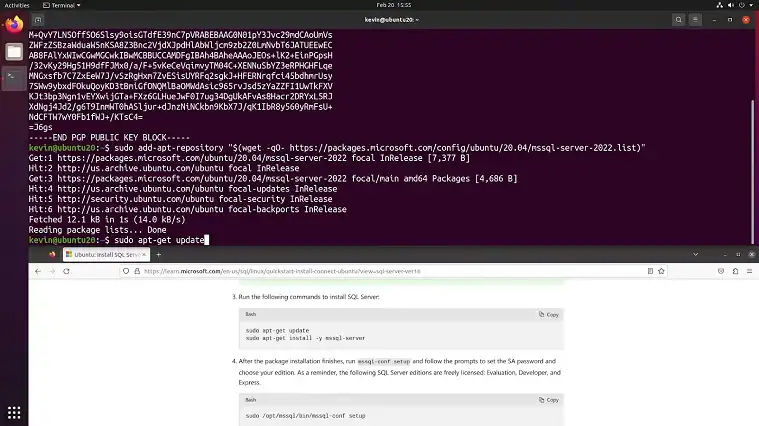
After the update completes, run the following command to install SQL Server:
sudo apt-get install -y mssql-server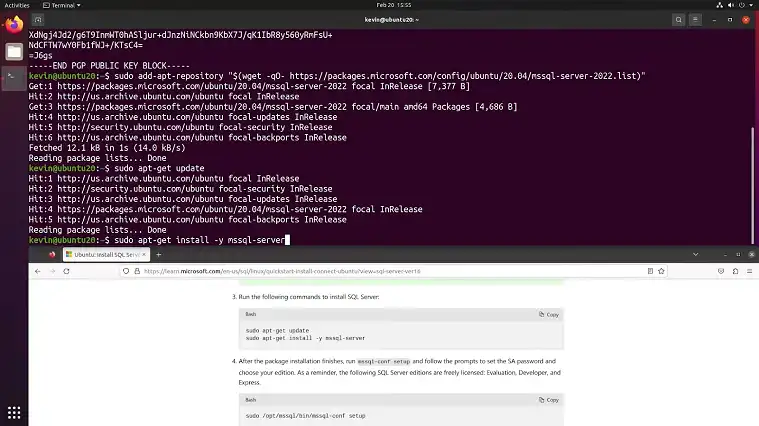
This command installs SQL Server and its dependencies on your Ubuntu system.
Step 4: Configure SQL Server
Once the installation is complete, you need to configure SQL Server to set up the system databases and define the administrative settings. Run the following configuration script:
sudo /opt/mssql/bin/mssql-conf setup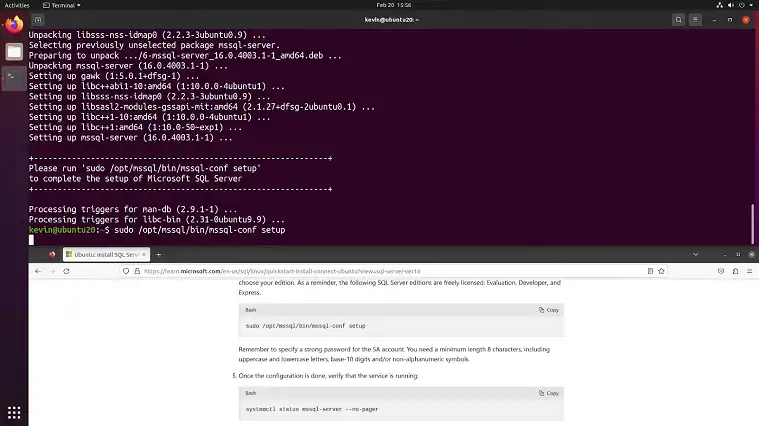
During the setup process, you will be prompted to:
- Choose the SQL Server Edition: You can choose from various editions, such as Developer, Express, or Evaluation.
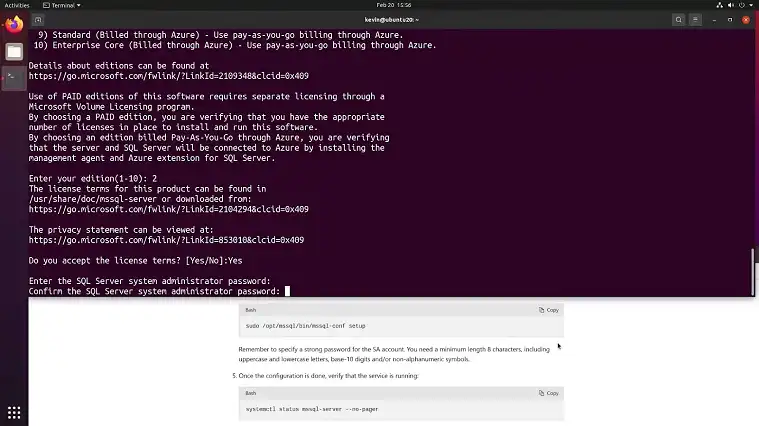
- Set the SA Password: This is the system administrator (SA) password for SQL Server. Ensure it meets the password complexity requirements.
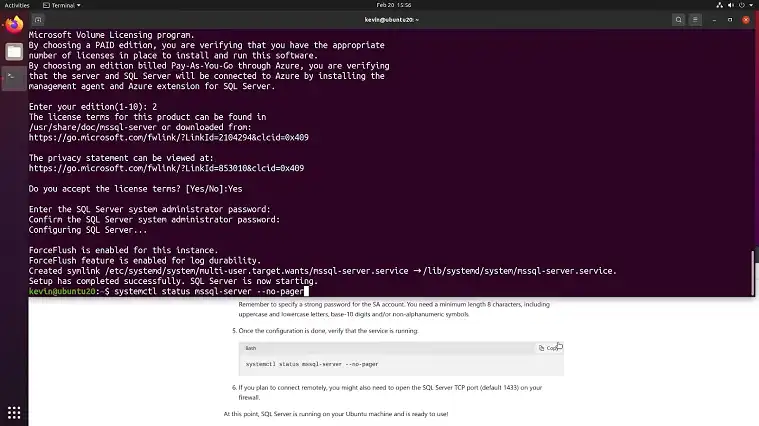
Step 5: Verify SQL Server Installation
To check that SQL Server is running correctly, use the following command:
systemctl status mssql-server --no-pager
If SQL Server is running properly, the output will indicate that the service is active and running.
You can also verify the SQL Server installation by connecting to it. Install the SQL Server command-line tools (sqlcmd and bcp) to test the connection:
sudo apt-get install -y mssql-tools unixodbc-dev

Add the tools to your system path for ease of use:
echo 'export PATH="$PATH:/opt/mssql-tools/bin"' >> ~/.bash_profile

echo 'export PATH="$PATH:/opt/mssql-tools/bin"' >> ~/.bashrc

source ~/.bashrc
To connect to SQL Server, use the sqlcmd command:
sqlcmd -S localhost -U SA -P '<YourPassword>'Replace <YourPassword> with the SA password you set during the configuration. You will enter the SQL Server command prompt if the connection is successful.
Step 6: Install SQL Server Agent (Optional)
SQL Server Agent is a component that allows you to automate and schedule tasks. It is not included in the initial installation, so you must install it separately if you need it:
sudo apt-get install -y mssql-server-agent
Start the SQL Server Agent service:
sudo systemctl enable mssql-server-agent
sudo systemctl start mssql-server-agent
Frequently Asked Questions
How do I uninstall SQL Server from Ubuntu?
To uninstall SQL Server, you can run sudo apt-get remove -y mssql-server followed by sudo apt-get purge -y mssql-server to remove any associated configurations.
How to run SQL in terminal in Ubuntu?
To use MySQL, open your command prompt and type `mysql db_name`. If you need to specify a username or password, use `mysql –user=user_name –password db_name`. After entering your password, you can type SQL statements followed by a semicolon, backslash G (`\g`), or capital G (`\G`) to execute them.
Conclusion
Installing SQL Server on Ubuntu is straightforward, thanks to Microsoft’s official support for Linux. By following this guide, you should be able to install and configure SQL Server on Ubuntu successfully. If you encounter any issues or have additional questions, feel free to let us know. Thanks for reading!