A Step-By-Step Guide on How to Delete Elastic IP in AWS
When you terminate an EC2 instance, AWS might not automatically remove the associated Elastic IP Addresses, leading to potential charges of $43.80 per year for each unassociated Elastic IP. In a sizable enterprise, this issue can result in substantial costs, but fortunately, it’s entirely preventable.
To delete an Elastic IP (EIP), you can use the AWS Management Console or AWS Command Line Interface (CLI). In this guide, we’ll walk you through the steps to identify and delete unused Elastic IP in AWS, potentially saving significant expenses. Let’s see to it.
Why Delete an Elastic IP?
Deleting an Elastic IP is not a decision to be taken lightly. There are scenarios where it becomes necessary, such as decommissioning instances, optimizing costs, or resolving issues arising from resource dependencies.
Unused Elastic IPs may incur unnecessary costs. Deleting them ensures that resources are allocated where they are genuinely needed, contributing to a more cost-effective AWS infrastructure.
How Do I Remove Elastic IP From AWS?
Below are the steps to identify Elastic IPs that require deletion and delete them to save you from unwanted expenses.
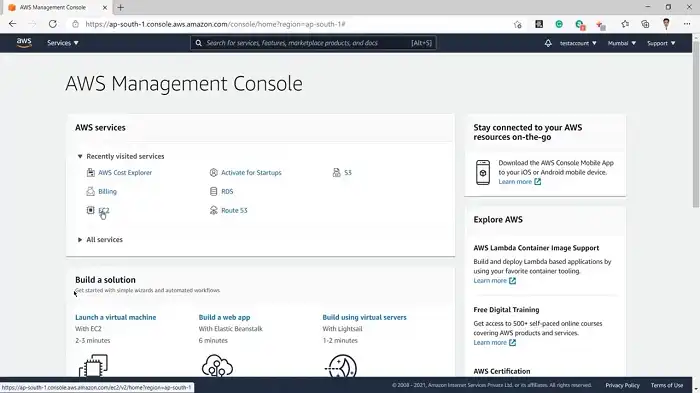
Step 1: Log in to the AWS Management Console
Open your web browser and navigate to the AWS Management Console. Log in with your AWS credentials.
Step 2: Go to the EC2 Dashboard
Once logged in, locate and click on the “EC2” service from the AWS Management Console.
Step 3: Select Elastic IPs
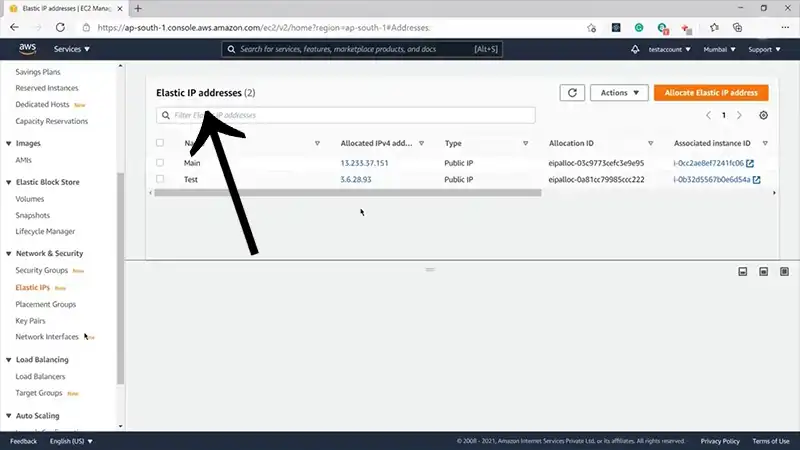
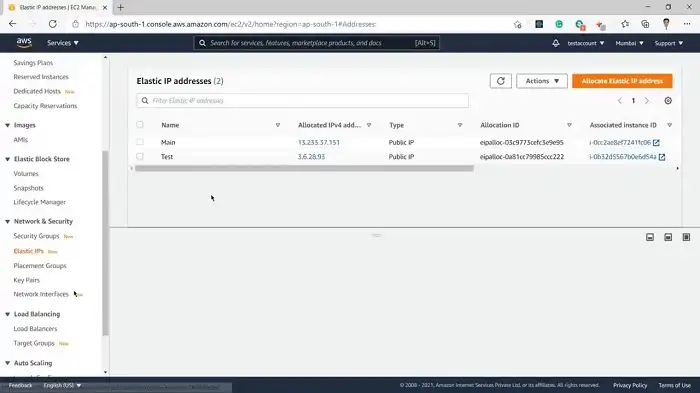
In the EC2 dashboard, find the “Elastic IPs” option on the left-hand side and click on it. This will take you to the page where all your Elastic IP addresses are listed.
Step 4: Identify the Elastic IP to Delete
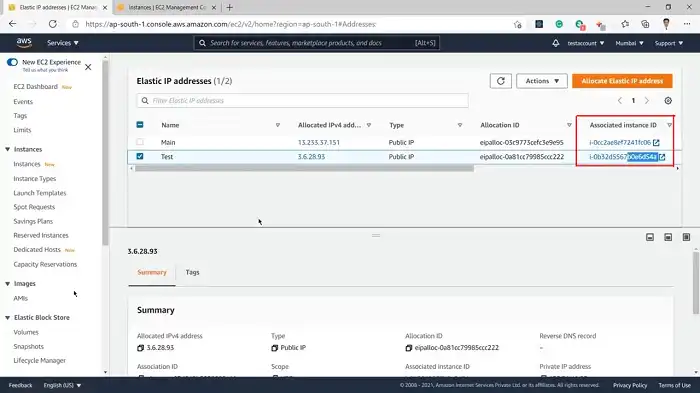
Review the list of Elastic IP addresses to identify the one you want to delete. Take note of the Elastic IP’s associated instance, if applicable, as deleting an Elastic IP will disassociate it from any associated EC2 instance. Locate all IP addresses lacking an associated instance ID, specifically those with an empty value in the “Associated Instance ID” field.
You can also use the command below to identify unattached elastic IPs.
aws ec2 describe-addresses –query “Addresses[?AssociationId==null]”
Step 5: Disassociate the Elastic IP
If the Elastic IP is currently associated with an EC2 instance, you need to disassociate it before deleting. Select the Elastic IP in question, and from the “Actions” dropdown menu, choose “Disassociate Elastic IP Address.”
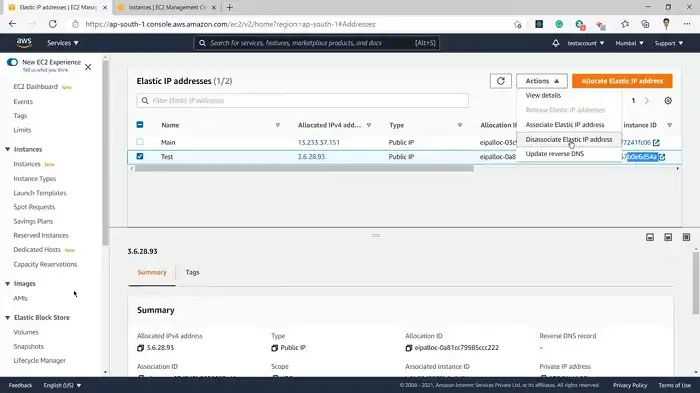
Confirm the action when prompted.
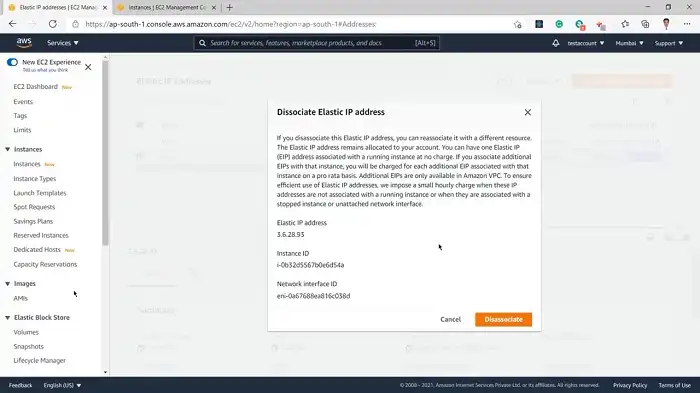
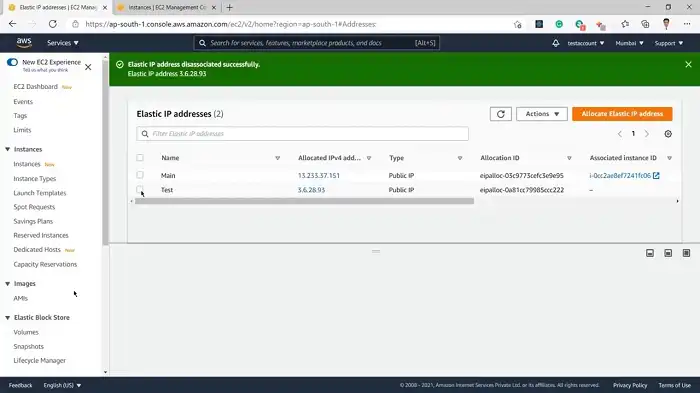
If you want to do it via AWS CLI, the command to use is as follows.
aws ec2 disassociate-address –association-id <your-association-id>
Step 6: Delete the Elastic IP
Once the Elastic IP is disassociated, select it again from the list. In the “Actions” dropdown menu, choose “Release Elastic IP Address.”
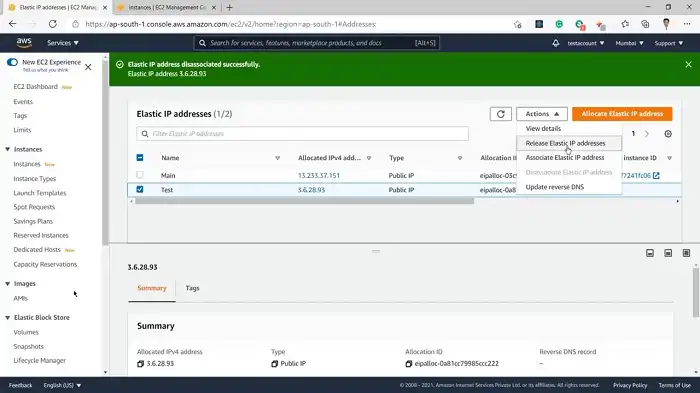
AWS will prompt you to confirm the release. Confirm the action to delete the Elastic IP.
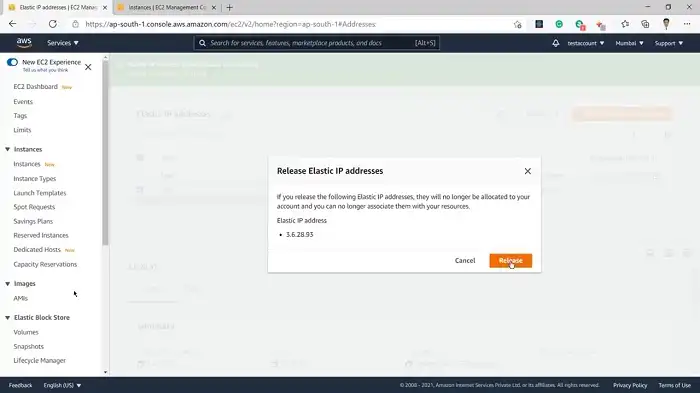
Alternatively, if you prefer using the AWS CLI, you can use the following command:
aws ec2 release-address –allocation-id <your-allocation-id>
Replace <your-allocation-id> with the actual allocation ID of your Elastic IP. You can find the allocation ID in the AWS Management Console or by using the describe-addresses command with the AWS CLI.
After confirming the release, it might take a moment for the Elastic IP to be fully deleted.
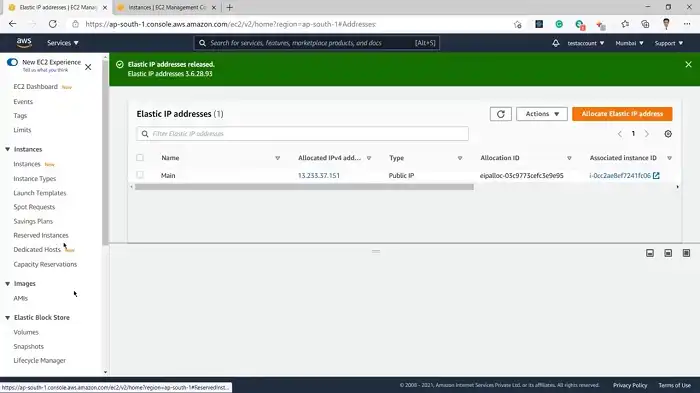
You can verify the deletion by checking the list of Elastic IPs on the page. The deleted Elastic IP should no longer appear in the list.
Frequently Asked Questions
Can I delete an Elastic IP that is associated with an EC2 instance?
No, you must first disassociate the Elastic IP from the EC2 instance before deleting it.
What happens to the associated EC2 instance when I disassociate an Elastic IP?
Disassociating an Elastic IP does not affect the running EC2 instance. It simply removes the Elastic IP from the instance.
Can I recover a deleted Elastic IP?
No, once an Elastic IP is deleted, it cannot be recovered. Ensure you no longer need it before proceeding with the deletion.
Conclusion
Congratulations! You have successfully deleted an Elastic IP in AWS, a strategic move to maintain a streamlined and cost-effective cloud infrastructure. You’re now one step closer to ensuring optimal resource management and minimizing costs for your business. Thanks for reading!

